Connecting with a Custom App Registration
Most customers connect their tenant with the standard Connecting Your Intune Tenant flow, where Robopack creates its own enterprise application and you grant it admin consent. If your security policy requires you to own and control the Entra ID application that Robopack uses — rather than consenting to Robopack's default app — you can create your own app registration and register it with Robopack instead.
Use a custom app registration when you need to:
- Own the application object, its credentials, and its permission grants in your own tenant
- Control the exact permissions granted to Robopack
- Manage secret rotation and conditional access on the application yourself
- Satisfy a policy that disallows consenting to third-party multi-tenant enterprise apps
What you'll need
- A completed Robopack trial setup
- Global Administrator rights in your Entra ID tenant — required to create the registration and grant admin consent
- Access to the Microsoft Entra admin center
Overview
A custom app registration replaces Robopack's default enterprise app with one you create and own. The process has two halves:
- In Entra ID — create the app registration, grant it the permissions Robopack needs, and create a client secret.
- In Robopack — register that app registration by entering its Directory (tenant) ID, Application (client) ID, and client secret.
Part 1 — Create the app registration in Entra ID
- Sign in to the Microsoft Entra admin center.
- Go to Identity → Applications → App registrations and select New registration.
- Give it a recognisable name, for example
Robopack. - Under Supported account types, choose Accounts in this organizational directory only (single tenant).
- Leave Redirect URI blank and select Register.
- On the app's Overview page, copy the Application (client) ID and the Directory (tenant) ID — you'll enter both into Robopack later.
Part 2 — Add the required permissions and grant admin consent
Your app registration needs the same Microsoft Graph permissions that Robopack's default app uses. Add both the Application and the Delegated permissions from the tables below (User.Read is usually present by default on a new registration).
- In your app registration, open API permissions.
- Select Add a permission → Microsoft Graph → Application permissions. Search for each permission in the Application permissions table below, tick it, then select Add permissions.
- Select Add a permission → Microsoft Graph → Delegated permissions and add each permission in the Delegated permissions table below the same way.
- When every permission is listed, select Grant admin consent for your organisation and confirm. Each permission should then show a green Granted status.
Application permissions
| Permission | Grants |
|---|---|
DeviceManagementApps.ReadWrite.All | Read and write Microsoft Intune apps |
DeviceManagementConfiguration.Read.All | Read Microsoft Intune device configuration and policies |
DeviceManagementServiceConfig.ReadWrite.All | Read and write Microsoft Intune configuration |
DeviceManagementManagedDevices.Read.All | Read Microsoft Intune devices |
Device.Read.All | Read all devices |
Group.ReadWrite.All | Read and write all groups |
Organization.Read.All | Read organization information |
AdministrativeUnit.Read.All | Read administrative units. Only needed for Connecting with an Administrative Unit, which also lets you leave out Group.ReadWrite.All |
It is possible to remove Robopack's permission to read your groups. Robopack then cannot list your Entra ID groups, so wherever you choose groups it offers only the All Users and All Devices virtual groups. You can still target a specific group by entering its group ID: Robopack uses the group, but does not show it in the Robopack interface.
Delegated permissions
| Permission | Grants |
|---|---|
User.Read | Sign in and read user profile |
DeviceManagementApps.ReadWrite.All | Read and write Microsoft Intune apps |
Organization.Read.All | Read organization information |
Robopack authenticates to a custom registration with the tenant ID, client ID, and client secret — an app-only (client-credentials) connection — so the Application permissions are what it uses at runtime. The Delegated permissions are included to mirror Robopack's default app; add both sets so your registration grants exactly the same access.
Without admin consent, background automation (packaging, patching, imports) cannot run. Make sure every permission shows Granted before continuing.
Part 3 — Create a client secret
- In your app registration, go to Certificates & secrets → Client secrets → New client secret.
- Add a description (e.g.
Robopack) and choose an expiry that matches your secret-rotation policy. - Select Add, then copy the secret Value immediately — it is shown only once.
Client secrets expire. Note the expiry date and create a new secret — and update it in Robopack — before it lapses, or the connection will stop working.
Part 4 — Register the app registration with Robopack
-
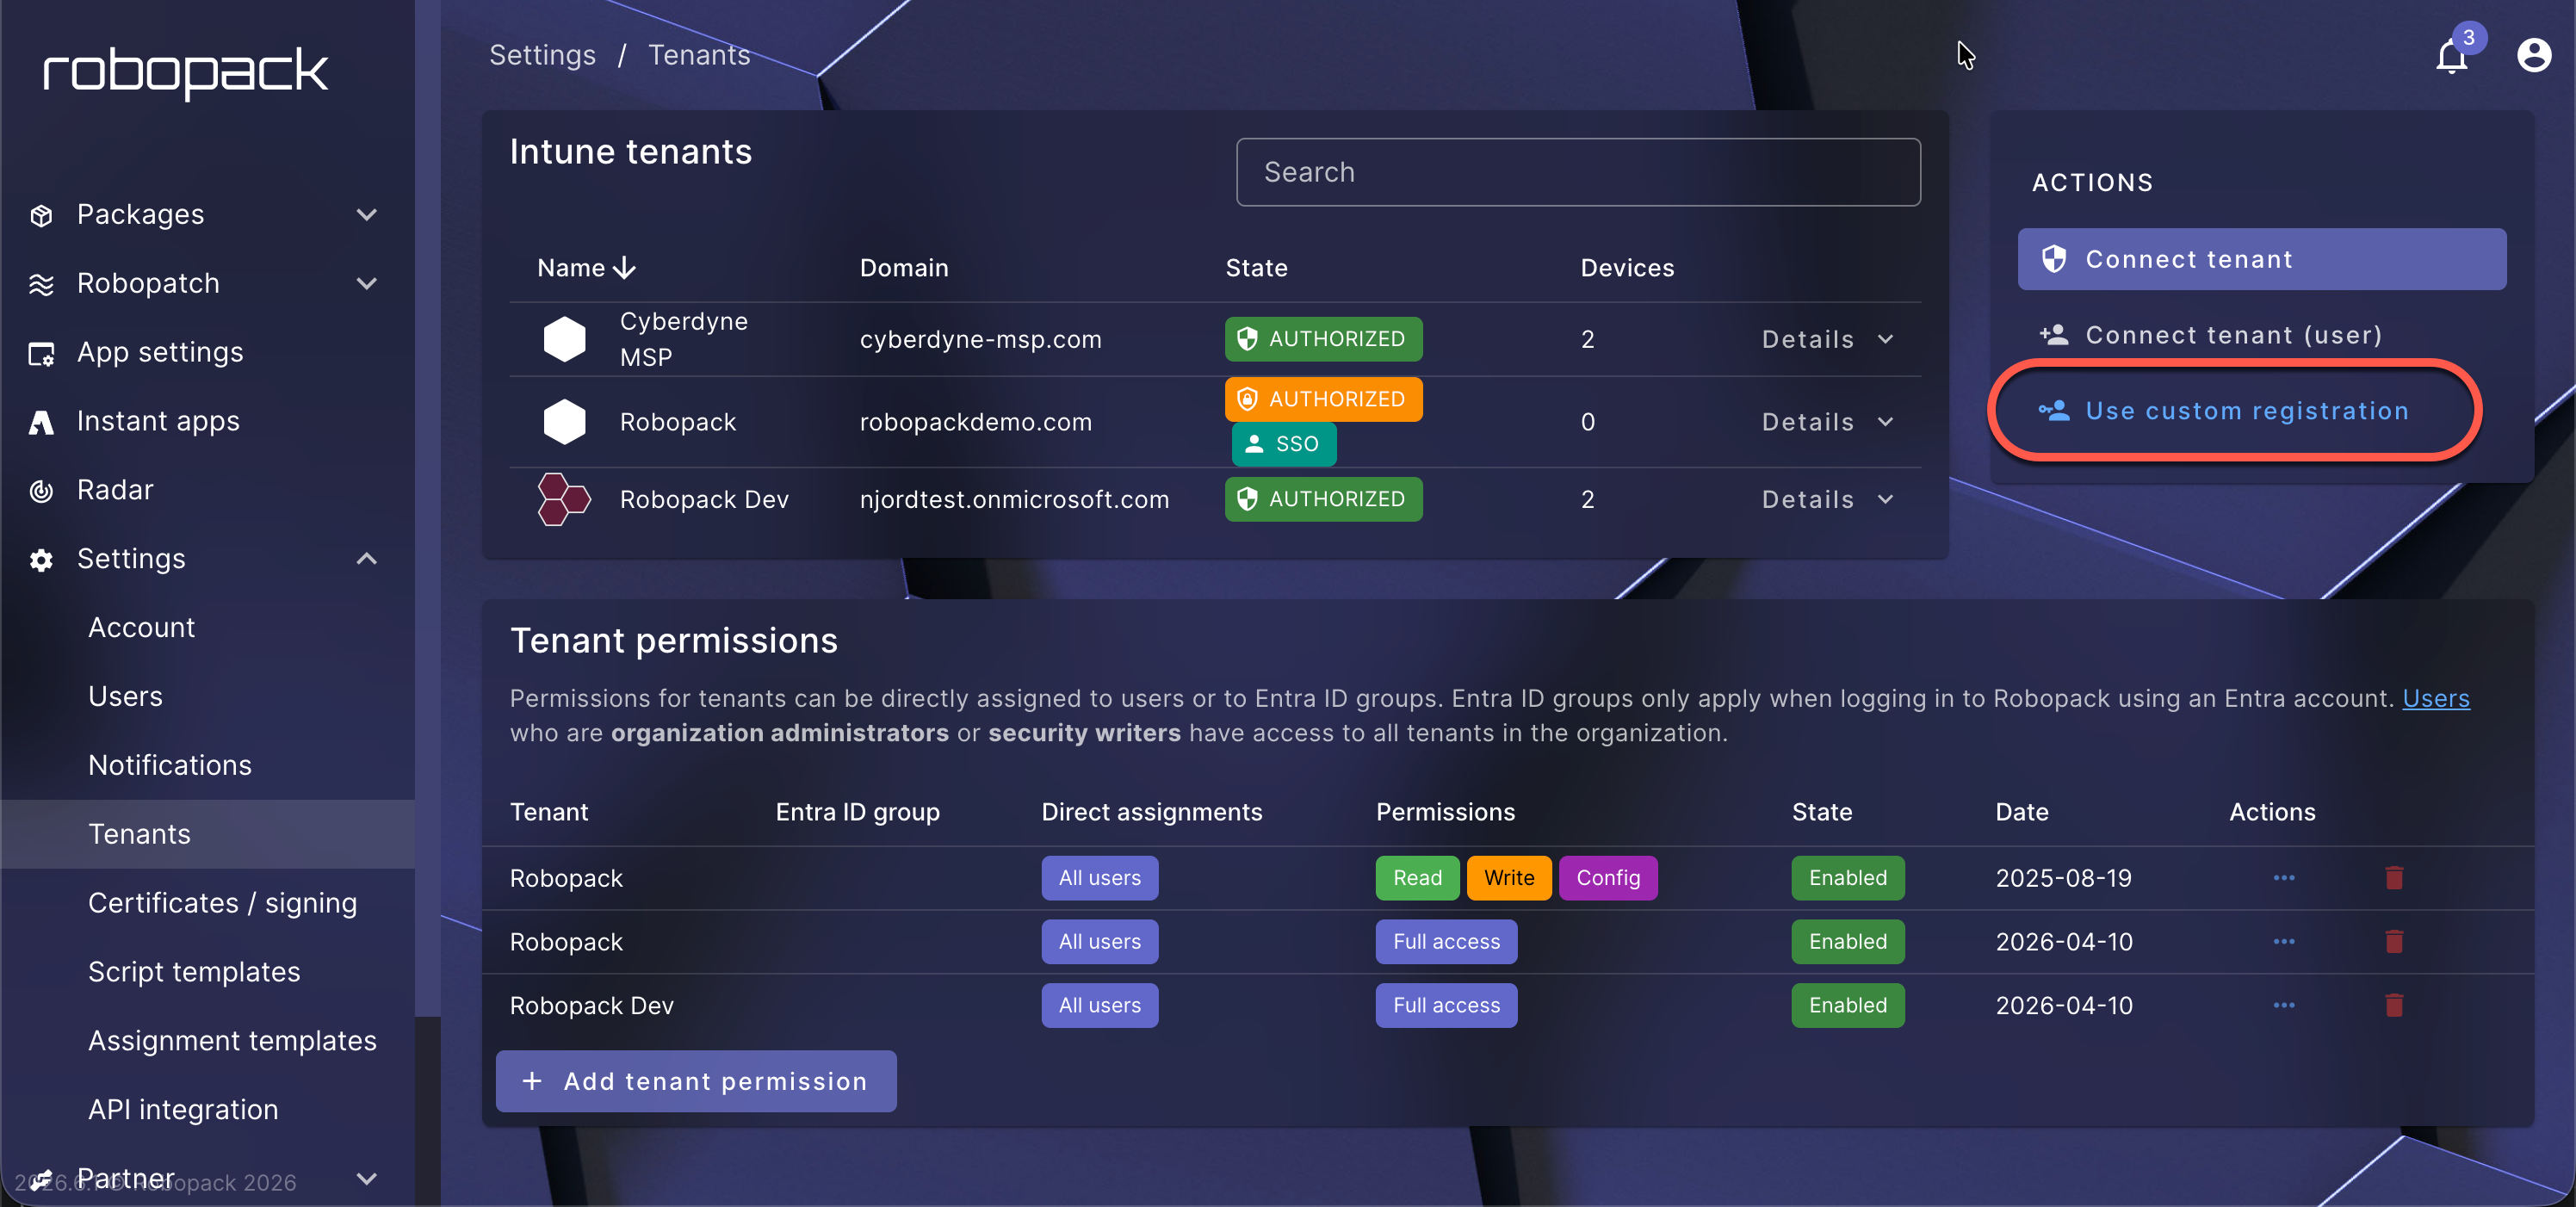
In Robopack, go to Settings → Tenants.
-
In the Actions panel, select Use custom registration.
-
In the Use custom app registration dialog, enter:
- Directory (tenant) ID — the tenant that contains your app registration
- Application (client) ID — your custom app registration's client ID
- Client secret — the secret value you created in Part 3
-
Select Process App registration.
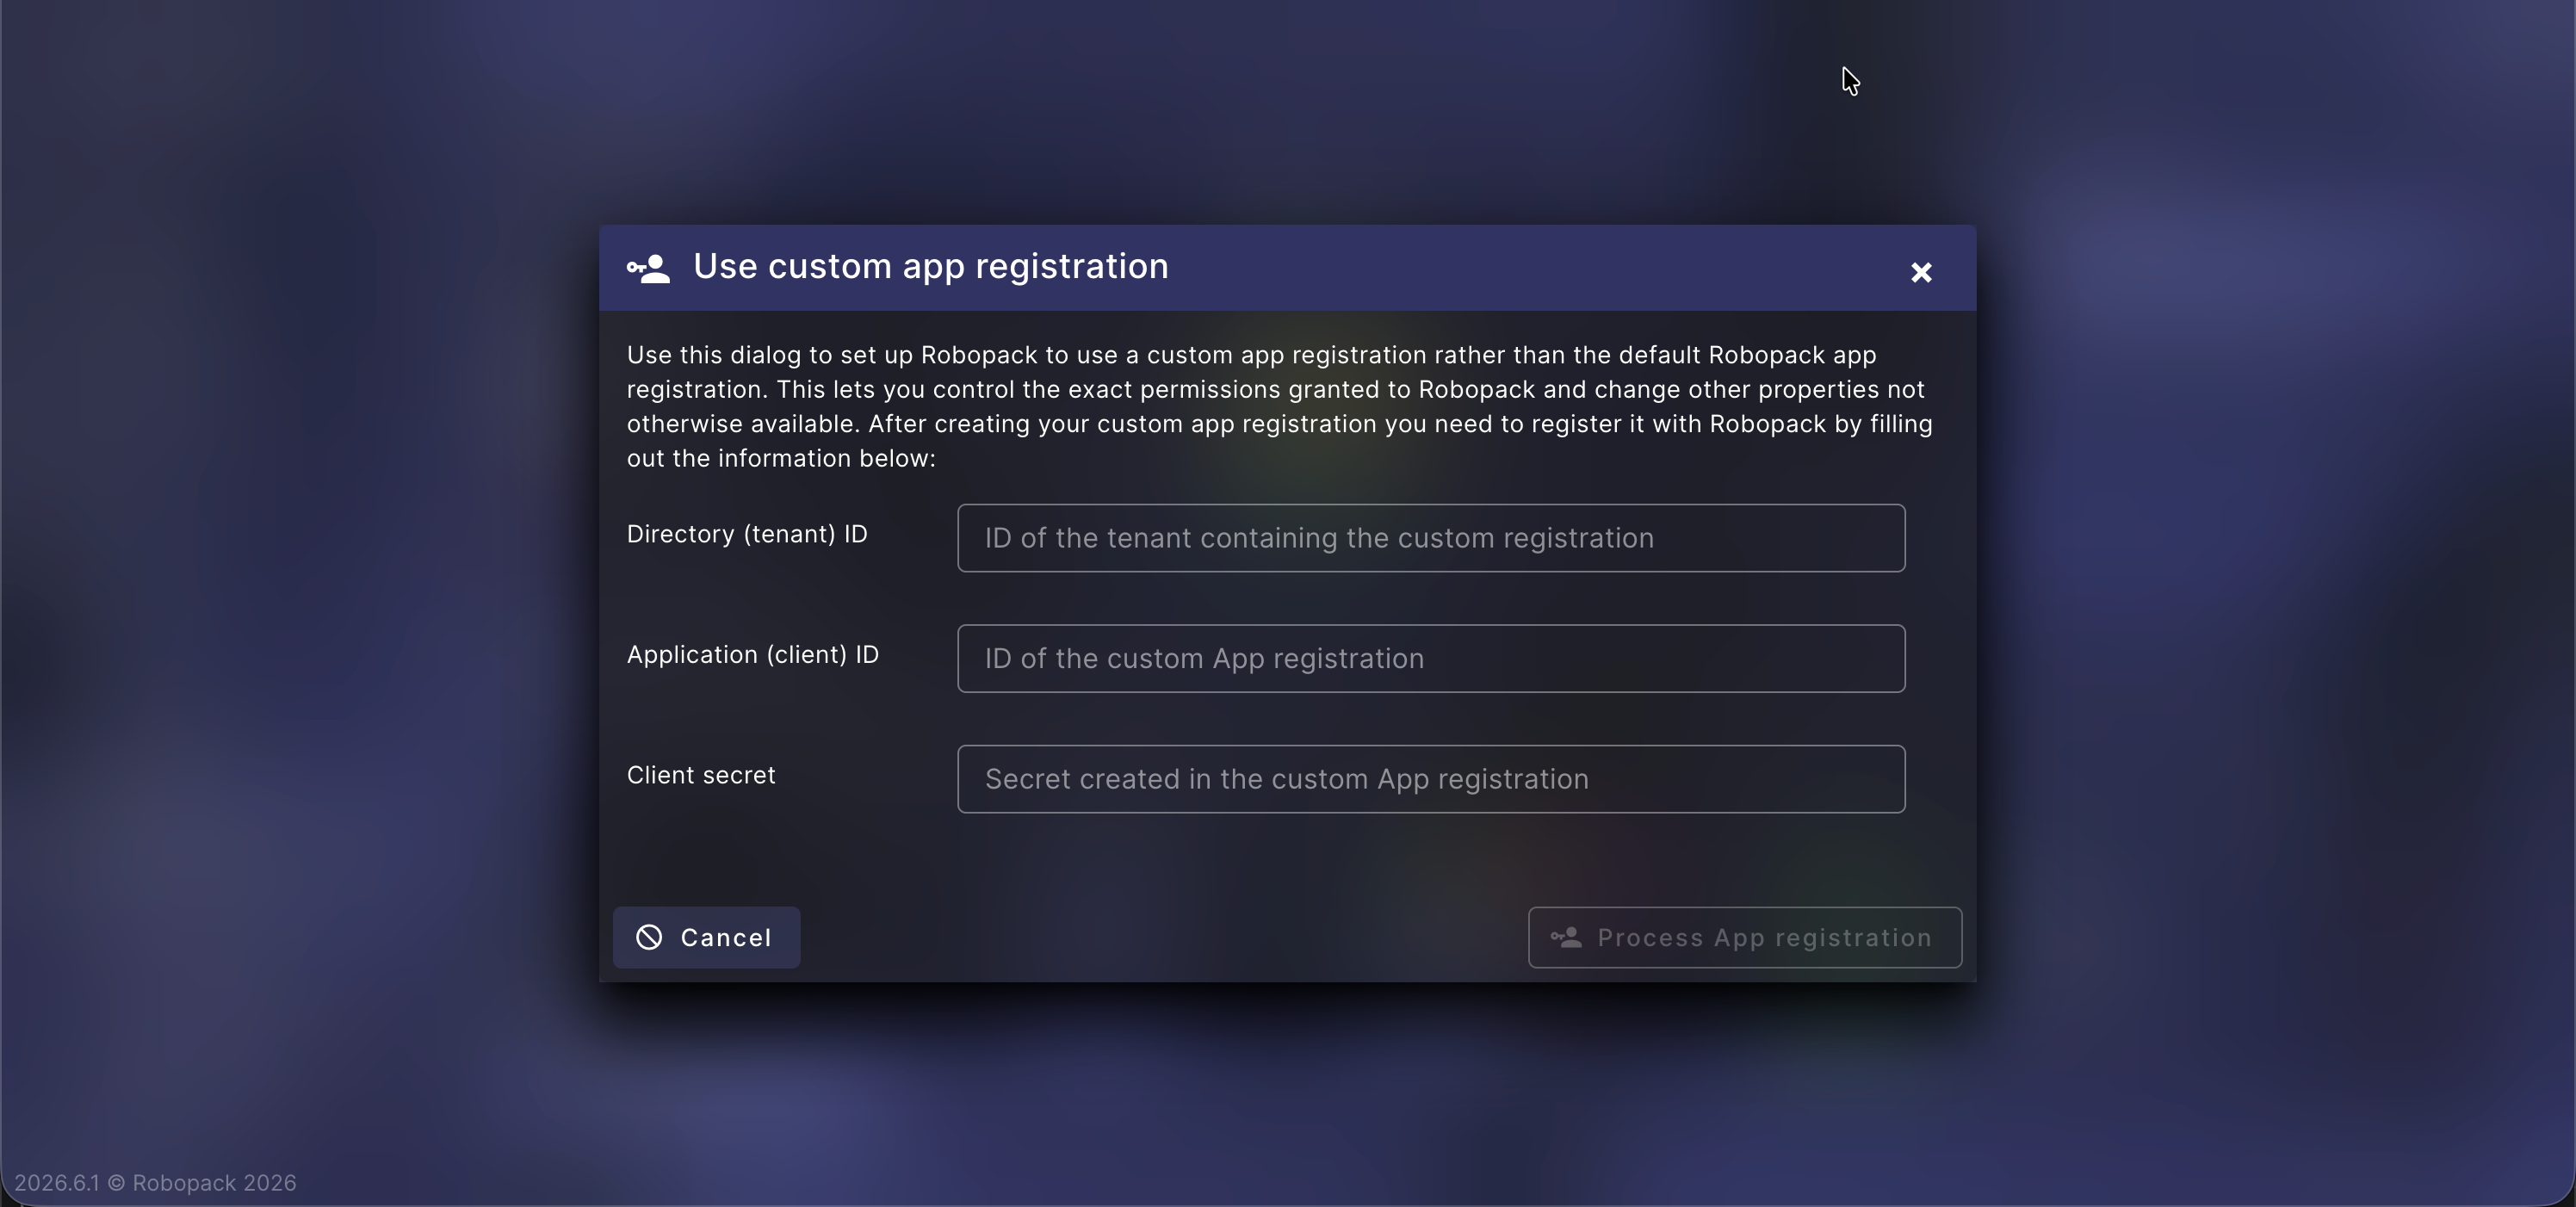
Robopack validates the details and switches the tenant over to your custom app registration.
Part 5 — Verify the connection
- On Settings → Tenants, the tenant should show an Authorized state.
- To confirm from Microsoft's side, go to Entra admin center → Identity → Applications → Enterprise applications, open your app, and review Permissions. Entra automatically creates a matching enterprise application for your registration when you grant admin consent.
When your client secret nears expiry, create a new one in Entra ID and run Use custom registration again with the new secret value.
What's next?
- Deploy your first app from the Instant Apps library
- Configure Roles & Permissions for your team